
Fix the “Camera malfunction” popup on Windows — SCREENish Help
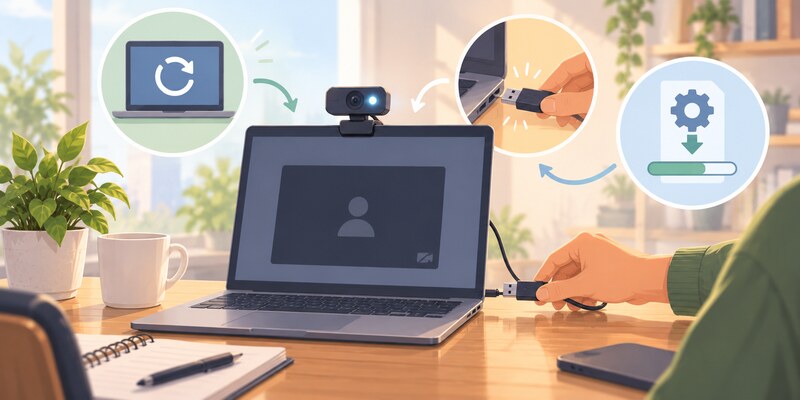
“Camera malfunction” popup: what it means and how to fix it (Windows)
What this message means
If SCREENish showed you this popup:
Camera malfunction
Your camera appears to be malfunctioning and is not sending any video.
it means your camera turned on but is not sending any picture to the computer. The camera responded when the software switched it on — but then no video ever arrived.
This is a problem with the camera, its cable, or its driver (the small piece of Windows software that runs it). It is not a SCREENish setting, and there is nothing to configure inside SCREENish to fix it.
The good news: in most cases this fixes itself with a simple restart.
Step 1 — Confirm it yourself (takes 1 minute)
You don’t need a technician to find out whether the camera is really broken. Windows has a built-in Camera app that talks to the camera directly:
- Close SCREENish (right-click its icon in the tray, near the clock, and quit) so the two programs don’t compete for the camera during this test.
- Click Start, type Camera, and open the Camera app.
- Look at the picture.
What the result tells you:
Black screen, frozen image, endless spinner, or an error → the camera itself is the problem. Continue with the fix steps below.
You see yourself normally → the camera has recovered (this happens — some faults are temporary). Start SCREENish again and work normally. If the popup comes back later, the camera is failing intermittently — follow the steps below anyway, and mention it to your administrator if it keeps returning.
Remember this test — it is also your proof at the end. If the Windows Camera app can’t show video, no other program can either.
Step 2 — Fix it (easiest first)
Work through these in order. After each step, re-check with the Camera app from Step 1.
1. Restart the computer
Not just sign out — a full Start → Power → Restart. This resets the camera, its USB connection, and its driver in one go, and fixes the large majority of these cases. Do this first, before anything else.
2. Check for a privacy shutter or camera off-switch
Many laptops and webcams have a way to physically block the camera, and a blocked camera behaves exactly like this: it switches on, but sends no picture (or pure black).
- Look for a small sliding cover over the camera lens (or a sticker or tape someone put there).
- Many laptops have a camera on/off key on the keyboard — a key with a camera or crossed-out camera symbol (often F8 or F10). Press it (you may need to hold the Fn key at the same time) and re-test.
- Some webcams have a physical switch on the side or on the cable.
3. Check Windows camera permissions
- Open Start → Settings → Privacy & security → Camera.
- Make sure Camera access is On.
- Make sure Let apps access your camera is On.
- Make sure Let desktop apps access your camera (at the bottom) is On.
4. If it’s a USB (external) webcam — reconnect it
- Unplug it, wait 10 seconds, plug it back in.
- Try a different USB port — ideally one directly on the computer, not on a USB hub, docking station, or monitor.
- Check the cable isn’t pinched or damaged.
5. Reset the camera in Device Manager
This restarts just the camera’s driver:
- Right-click Start → Device Manager.
- Open the Cameras section (sometimes called Imaging devices).
- Right-click your camera → Disable device → confirm. Wait 5 seconds.
- Right-click it again → Enable device. Re-test with the Camera app.
If that didn’t help, do a full driver reinstall:
- Right-click the camera → Uninstall device (tick “delete the driver” if the checkbox is offered) → restart the computer. Windows reinstalls the camera automatically on startup.
6. Stop Windows from powering the camera off
Windows sometimes puts USB devices to sleep to save power, and some cameras don’t wake up properly — they stay on but stop sending video. This is a known cause of exactly this fault, especially on laptops:
- Right-click Start → Device Manager.
- Open Universal Serial Bus controllers.
- Double-click each USB Root Hub → Power Management tab → untick “Allow the computer to turn off this device to save power” → OK.
- If your camera under Cameras also has a Power Management tab, untick the same box there.
7. Update Windows and the camera driver
- Start → Settings → Windows Update → Check for updates — install everything, including anything under Optional updates → Driver updates.
- For laptops: the maker’s support app (Lenovo Vantage, Dell SupportAssist, HP Support Assistant, …) often has a newer camera driver than Windows Update.
8. Check your antivirus’s “webcam protection”
Some security programs (Kaspersky, Norton, ESET, Bitdefender, …) include a webcam-protection feature that can silently block video while the camera appears switched on. Open your antivirus, look for webcam protection / camera privacy, and either allow access for your applications or temporarily turn the feature off and re-test.
Still no picture after all of the above?
If you restarted the computer and worked through the steps and the Windows Camera app still shows no video, the camera hardware is most likely failing and needs to be replaced. That’s not a guess — the Camera-app test proves the fault is in the camera itself, on a program that has nothing to do with SCREENish.
- Laptop built-in camera: a repair is usually not worth it — a basic external USB webcam costs very little, plugs in, and works immediately.
- External webcam: if possible, test it on another computer first. If it fails there too, replace it.
Tell your administrator the outcome — they have already been notified automatically and will see the camera issue on their report until it’s resolved.
- While an employee’s camera is in this state, your report shows a “Camera malfunction — please contact the employee” card for the affected minutes, so the gap is explained — it is not counted as the employee hiding from the camera.
- The employee sees the popup at most once every 30 minutes; it is intentionally not nagging.
- SCREENish keeps re-checking the camera automatically. The moment the camera works again, face verification resumes by itself — the employee does not need to restart SCREENish or change any setting.
- If the same machine shows the card repeatedly across days, plan a camera replacement — this popup only appears for faults on the employee’s machine that SCREENish cannot work around.
 Author Administrator ScreenishPosted on Categories Customer Service, Help article, Troubleshooting, Work Process